本文章以封装toast组件为例(文章最后附有组件代码)
1.新建index.js文件
在对应组件的目录下新建index.js文件,添加代码如下
1
2
3
4
5
6
7
8
9
10
11
12
13
14
15
16
17
18
19
20
21
22
23
|
import Toast from "./Toast";
const obj = {};
obj.install = function(Vue) {
const toastContrustor = Vue.extend(Toast);
const toast = new toastContrustor();
toast.$mount(document.createElement("div"));
document.body.appendChild(toast.$el);
Vue.prototype.$toast = toast;
}
export default obj
|
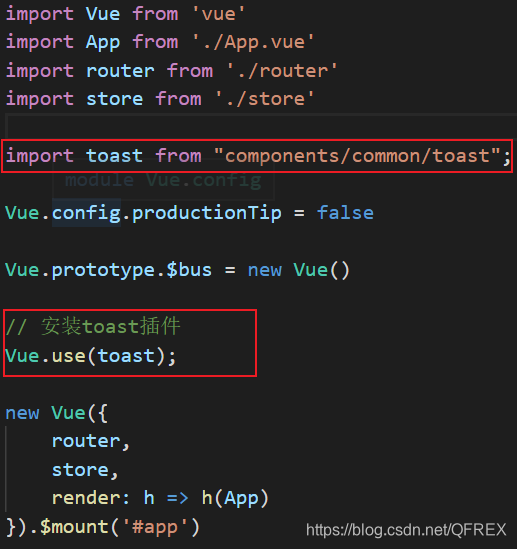
2.安装插件
在第一步中已经完成了封装,现在要安装封装好的插件,在main.js添加如下代码:
3.使用
例如:this.$toast.show(res, 2000);
最后,附上封装的组件内的代码(文件名称:toast.vue)
1
2
3
4
5
6
7
8
9
10
11
12
13
14
15
16
17
18
19
20
21
22
23
24
25
26
27
28
29
30
31
32
33
34
35
36
37
38
39
40
| <template>
<div class="toast" v-show="isShow">
<div>{{message}}</div>
</div>
</template>
<script>
export default {
name: "Toast",
data() {
return {
message: "",
isShow: false,
};
},
methods: {
show(message, duration) {
this.message = message;
this.isShow = true;
setTimeout(() => {
this.message = "";
this.isShow = false;
}, duration);
},
},
};
</script>
<style scoped>
.toast {
position: fixed;
top: 50%;
left: 50%;
transform: translate(-50%, -50%);
background-color: rgba(0, 0, 0, 0.75);
padding: 10px 20px;
z-index: 999;
color: white;
border-radius: 5px;
font-size: 20px;
}
</style>
|